
Onigiri, or Japanese rice balls, are a beloved staple in Japanese cuisine. These delightful snacks are perfect for a quick meal or a picnic. They are simple to make and can be customized with various fillings to suit your taste. Whether you prefer them plain or filled, onigiri are a versatile and delicious treat.
When preparing onigiri, you might need to visit a specialty store for a few ingredients. Japanese short-grain rice is essential for the right texture and stickiness. Nori (seaweed) adds a savory flavor and helps keep the rice ball intact. If you choose to use a filling, tuna canned in water, soy sauce, and mayonnaise are common options. These ingredients might not be in your pantry, so plan accordingly.
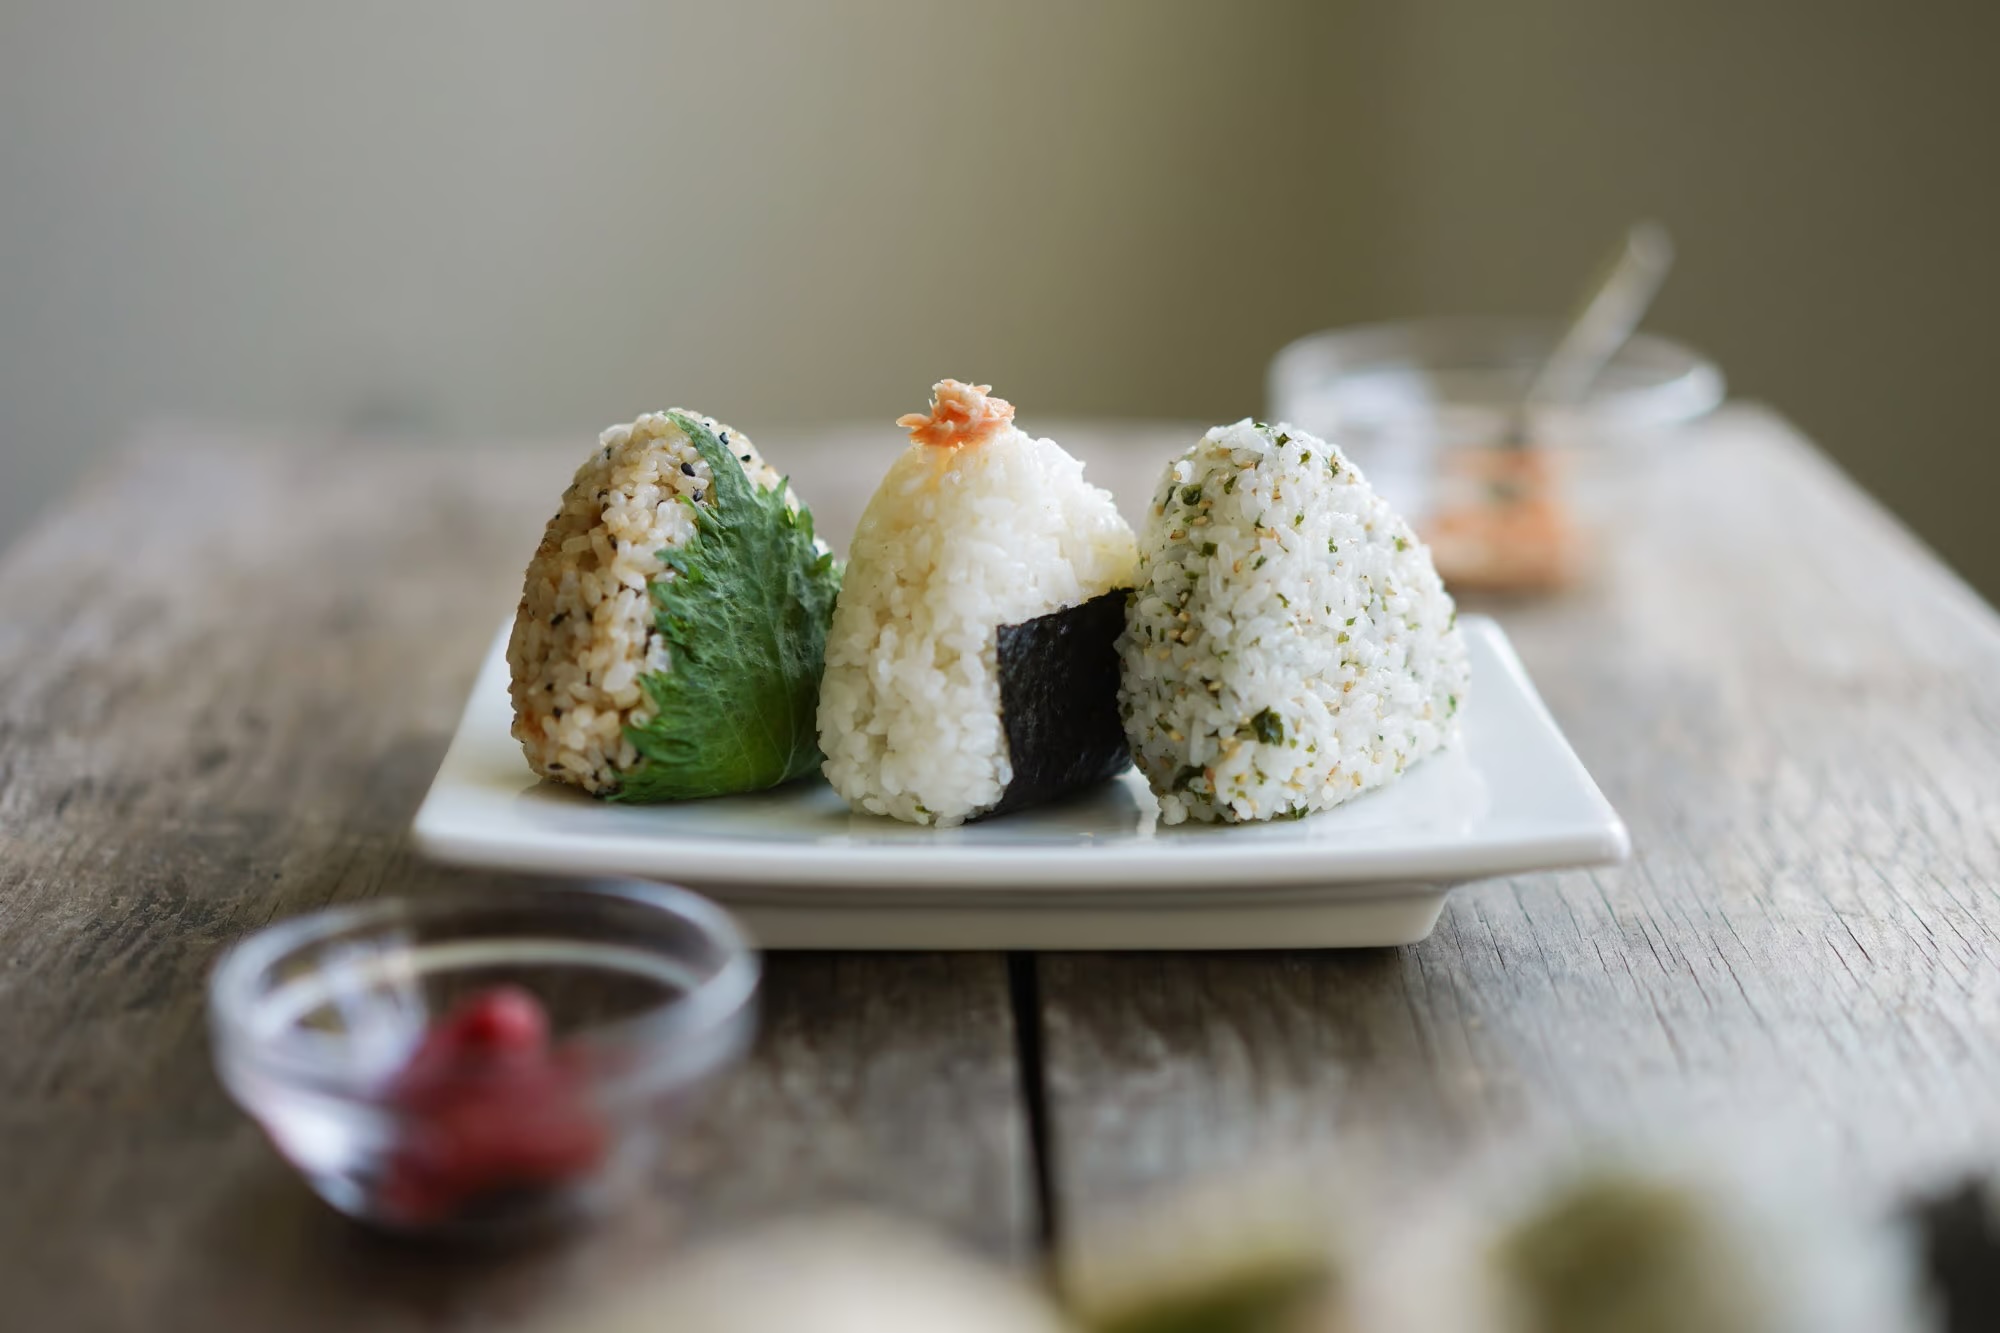
Ingredients For Onigiri Japanese Rice Balls Recipe
Japanese short-grain rice: This type of rice is sticky and perfect for forming rice balls.
Water: Used to cook the rice.
Salt: Adds flavor to the rice and helps preserve it.
Nori: Seaweed sheets cut into strips to wrap around the rice balls.
Tuna: Optional filling, usually canned and drained.
Soy sauce: Adds a savory flavor to the filling.
Mayonnaise: Adds creaminess to the filling.
Technique Tip for Perfect Onigiri
When forming onigiri, keep a small bowl of water nearby to dip your hands in frequently. This prevents the rice from sticking to your hands and makes it easier to shape the rice balls. Additionally, using a bit of salt on your hands not only adds flavor but also helps to preserve the onigiri.
Suggested Side Dishes
Alternative Ingredients
japanese short-grain rice - Substitute with sushi rice: Sushi rice is also a type of short-grain rice and has a similar sticky texture, making it an excellent substitute.
japanese short-grain rice - Substitute with arborio rice: Arborio rice, commonly used in risotto, has a similar stickiness and can work in a pinch.
water - Substitute with dashi stock: Using dashi stock instead of water can add a deeper umami flavor to the rice.
salt - Substitute with soy sauce: Soy sauce can add a salty flavor along with a touch of umami, enhancing the overall taste.
nori (seaweed) - Substitute with rice paper: Rice paper can be used to wrap the rice balls if nori is unavailable, though it will have a different texture.
nori (seaweed) - Substitute with shiso leaves: Shiso leaves provide a fresh, herbal flavor and can be used to wrap the rice balls.
tuna - Substitute with canned salmon: Canned salmon has a similar texture and can be used as a filling.
tuna - Substitute with chicken breast: Cooked and shredded chicken breast can be used as a filling for a different flavor profile.
soy sauce - Substitute with tamari: Tamari is a gluten-free alternative to soy sauce with a similar flavor.
mayonnaise - Substitute with Greek yogurt: Greek yogurt can provide a creamy texture with a tangy flavor, making it a healthier alternative.
mayonnaise - Substitute with avocado: Mashed avocado can add creaminess and a unique flavor to the filling.
Alternative Recipes Similar to Onigiri
How to Store or Freeze Your Onigiri
Allow the onigiri to cool completely at room temperature before storing. This prevents condensation, which can make the rice soggy.
Wrap each onigiri individually in plastic wrap. This keeps them fresh and prevents them from sticking together.
Place the wrapped onigiri in an airtight container. This helps maintain their moisture and flavor.
Store the container in the refrigerator if you plan to consume the onigiri within 1-2 days. For longer storage, proceed to freezing.
To freeze, place the wrapped onigiri in a freezer-safe bag or container. Label with the date to keep track of freshness.
When ready to eat, thaw the onigiri in the refrigerator overnight. For a quicker option, use the microwave: unwrap the onigiri, place it on a microwave-safe plate, and cover with a damp paper towel. Heat on medium power for 1-2 minutes or until warmed through.
If the nori becomes soggy, replace it with fresh strips just before serving. This ensures a crisp texture.
Avoid reheating onigiri multiple times as it can dry out the rice and affect the taste.
For added flavor, consider brushing the onigiri with a bit of soy sauce before reheating. This adds a savory touch and enhances the overall taste.
If using fillings like tuna or mayonnaise, consume the onigiri within 1-2 days for the best quality and to ensure food safety.
How to Reheat Leftovers
Microwave Method:
- Place the onigiri on a microwave-safe plate.
- Cover with a damp paper towel to keep the rice moist.
- Microwave on medium power for 1-2 minutes, checking halfway to ensure it heats evenly.
- Let it sit for a minute before enjoying.
Steaming Method:
- Fill a pot with a small amount of water and bring it to a simmer.
- Place the onigiri in a steamer basket over the simmering water.
- Cover and steam for about 5-7 minutes, or until heated through.
- Carefully remove and let it cool slightly before eating.
Pan-Frying Method:
- Heat a non-stick pan over medium heat and add a small amount of vegetable oil.
- Place the onigiri in the pan and cook for 2-3 minutes on each side, until the outside is crispy and the inside is warm.
- Remove from the pan and let it cool slightly before serving.
Oven Method:
- Preheat the oven to 350°F (175°C).
- Wrap each onigiri in aluminum foil to prevent it from drying out.
- Place the wrapped onigiri on a baking sheet and bake for 10-15 minutes, or until heated through.
- Carefully unwrap and let it cool slightly before enjoying.
Essential Tools for Making Onigiri
Rice cooker: Used to cook the Japanese short-grain rice to the perfect texture.
Measuring cups: Essential for accurately measuring the rice and water.
Strainer: Used to rinse the rice under cold water until the water runs clear.
Mixing bowl: Handy for mixing the optional filling ingredients like tuna, soy sauce, and mayonnaise.
Spoon: Useful for scooping the rice and fillings.
Cutting board: Needed for cutting the nori (seaweed) into strips.
Knife: Used to cut the nori sheet into strips.
Small bowl: For holding water to wet your hands while forming the rice balls.
Salt shaker: To sprinkle salt on your wet hands before shaping the rice balls.
Plate: To place the finished onigiri rice balls.
Time-Saving Tips for Making Onigiri
Prepare the filling: Mix the tuna, soy sauce, and mayonnaise in advance to save time when assembling.
Use a rice cooker: Cooking rice in a rice cooker ensures perfect consistency and frees up your time for other tasks.
Cool the rice quickly: Spread the cooked rice on a baking sheet to cool it faster and make it easier to handle.
Wet hands: Keep a bowl of water nearby to quickly wet your hands, preventing the rice from sticking.
Pre-cut nori: Cut the nori into strips ahead of time to streamline the wrapping process.
Onigiri Japanese Rice Balls Recipe
Ingredients
Main Ingredients
- 2 cups Japanese short-grain rice
- 2.5 cups Water
- 1 teaspoon Salt
- 1 sheet Nori (seaweed), cut into strips
- 1 can Tuna, drained Optional filling
- 1 tablespoon Soy sauce Optional filling
- 1 tablespoon Mayonnaise Optional filling
Instructions
- Rinse the rice under cold water until the water runs clear.
- Cook the rice in a rice cooker with the water.
- Once cooked, let the rice cool slightly.
- Wet your hands with water and sprinkle with salt.
- Take a handful of rice and form into a ball or triangle shape.
- If using a filling, make a small indentation in the rice ball, add the filling, and cover with more rice.
- Wrap a strip of nori around the rice ball.
- Repeat with the remaining rice and fillings.
Nutritional Value
Keywords
More Amazing Recipes to Try 🙂
- Crisp Pickled Green Beans Recipe25 Minutes
- Flapjack Pancakes Recipe30 Minutes
- Spanish Sangria Recipe15 Minutes
- Garden Fresh Tomato Soup Recipe45 Minutes
- Lemon Drop Shots Recipe5 Minutes
- Manicotti Recipe1 Hours
- Christmas Breakfast Sausage Casserole Recipe1 Hours 5 Minutes
- Real Welsh Rarebit Recipe20 Minutes
Leave a Reply